Announcement

Collapse
No announcement yet.

How do you get the raw passes to = the beauty pass?

Collapse
X
 
  • Filter
  • Time
  • Show
Clear All
new posts

  • How do you get the raw passes to = the beauty pass?

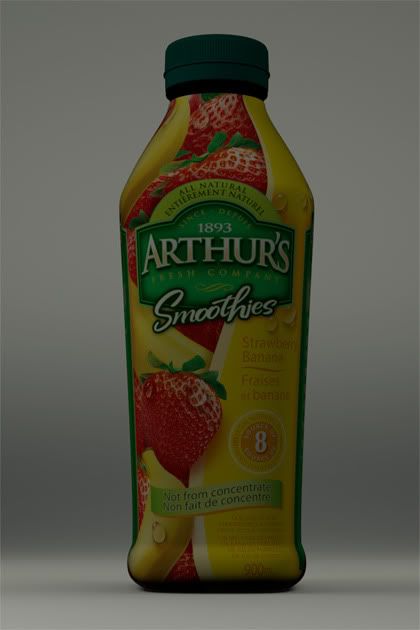
    Lighting + GI + Reflection + Refraction + Spec + SSS = Beauty. That equation seems to work out perfectly.

    Why is it that if you do (RawLight + RawGI x Diffuse) + (RawReflect x ReflectFilter) + Etc...the math never works out quite right?

    Am I doing something wrong or is this sort of a known thing?

  • #2
    (RawGI x Diffuse) + (RawLight x Diffuse) + (RawReflect x ReflectFilter) etc etc ?
    www.deex.info

    Comment


    • #3
      Yeah exactly. Usually when you do for example (RawGI x Diffuse) + (RawLight x Diffuse) you get a result extremely close to (GI + Lighting) but not quite there...yet on this recent project I was doing, my results were WAY off. When I merged the two different results with a difference blend in Nuke, they were so far off that I could clearly see the image (it should be almost entirely black, aka; no difference).

      Comment


      • #4
        Sounds like a record skipping.. hehehe Vlado does know about this, and I am sure he will get to it eventually. There are work arounds though.

        Comment


        • #5
          Any tips for workarounds Metzger? I've got a project where my results are really far off. The end result still looks fine after a bit of massaging, but it's not quite what I had designed for lighting in the Maya file. I'm used the the Raw passes not adding up 100% the same as the beauty, but this one particular thing is really off.

          Comment


          • #6
            Well for the reflection, you can rawreflect x reflection filter. Then ouput the reflect as well. Do a subtract between the reflect and the rawreflect x reflection filter. Then take that output and plus it back ontop of the rawreflect x reflection filter. I honestly don't don't use more than reflect, lighting, gi, spec, refraction, selfilum to make up the beauty. If the compositor can't match it up then I try to get it closer on the 2nd render. But that's really no excuse... It would be nice to have it just work out of the box.

            What's also important is a color pipeline for handling beauty and raw plates where you output a lut file from nuke to load into V-Ray. Once you get that workflow setup with your compositing, it's pretty much a final image out of v-ray when working to match plates with grades.

            Comment


            • #7
              My main issue with this job that's the limiting factor and forcing me into a Raw x Level pipeline instead of just a straight additive one is that I'm rendering a bottle for a product series with 10-12 flavours. It would be crazy to go ahead with rendering 12 images @ 4 or 8k when I could do this, so I'm simply rendering the beauty once and replacing my Diffuse layer with the various labels that I've rendered out.

              Then again with my distributed setup at home now, I'm rendering the 8k final output in around 30 minutes...maybe I should just go ahead with it and render them all. It just seems really unnecessary.

              I'll post examples when I get home of Lighting + GI vs RawLighting +GI x Diffuse.

              Comment


              • #8
                Yeah, I hear ya.. I think Vlado could change the math somewhere to get a correct dump of render passes but I can't speak for him. He definitely knows about this though. Since it has been brought up multiple times. If you search the forum there are a few threads about it. If I recall correctly it seems to be really noticeable when using glossy reflections.

                Comment


                • #9
                  Everything in my scene has at least SOME glossiness to it for realism (I'll never use a value of 1.0 on anything in a real scene) and in addition almost every material is a VRay Blend Mtl piped through a Bump Mtl once or twice...maybe that causes some errors in translation as well?

                  Though it's a studio lighting setup with a white backdrop, the backdrop has a simple white VRay Mtl and it's also giving wildy incorrect results...hmmm. And it's not uniformly off, if I start grading the Diffuse pass while viewing the Difference node in Nuke, different areas turn black (ie: become the same) at different levels of gain.

                  Comment


                  • #10
                    Do you have opacity on some shaders ?
                    Do you render in 32bits ?
                    www.deex.info

                    Comment


                    • #11
                      I've not bothered to do Raw elements. I just use traditional ones... diff, spec, refl, refr, gi, and lately, lightSelect elements. It's always nice when a program allows more flexibility, but I'm not really sure why you'd want to break things down into (raw)x(diffuse). Is the extra control really ever used by compers?

                      Andrew

                      Comment


                      • #12
                        Well basically this job is 10-12 bottles that are all completely identical other than the wrapper. The ideal workflow is: (((RawLight+RawGI)xDiffuse)+Reflection+Refraction+ Specular+SSS) so that I could simply swap out Diffuse passes to change the labels without having to really re-render anything.

                        The final output isn't THAT far off the actual renders from VRay, but it's not quite as natural looking and to my eye ends up slightly 'compy'.

                        I'm going to upload images to showcase how big the disparity is on this particular file tonight once I'm home.

                        Comment


                        • #13
                          Also if you break things down into Raw x Level it gives you freedom to sort of tweak the actual shaders in post. For example, if you were to offset the shadows on the ReflectionFilter pass, it would be similar to adding additional 0 degree reflectivity to your objects. You can't really achieve that easily by comping with the straight Reflection pass.

                          This also requires you setting your cutoff thresholds from 0.01 (which is actually quite high) to something like 0.001 so that more information is preserved.

                          Comment


                          • #14
                            Okay here's the images that I said I'd upload a while ago.

                            Image 1 = Raw render from VRay used for the comp instead of any render elements.

                            Image 2 = Comped image using render elements.

                            Image 3 = Difference between Reflection and Reflection x ReflectionFilter (almost completely black with some slight weirdness at edges, this is what I expect out of VRay normally in terms of the results differing).

                            Image 4 = Difference between Lighting + GI and RawLight + RawGI X Diffuse. WILDLY different results, this image should be nearly 100% black like the Reflection one.


                            It's a real head scratcher.

                            Comment


                            • #15
                              Be carreful between : RawLight + RawGI X Diffuse != (RawLight + RawGI) X Diffuse
                              You must to use (RawLight + RawGI) X Diffuse
                              or (RawLight X Diffuse) + (RawGI X Diffuse)
                              www.deex.info

                              Comment

                              Working...
                              X