If this is your first visit, be sure to
check out the FAQ by clicking the
link above. You may have to register
before you can post: click the register link above to proceed. To start viewing messages,
select the forum that you want to visit from the selection below.
Exciting News: Chaos acquires EvolveLAB = AI-Powered Design.
To learn more, please visit this page!
New! You can now log in to the forums with your chaos.com account as well as your forum account.
so Nomer and Stefanq...first off, great images. Second, are you guys using the HDR for the background in your images...im assuming yes? But how do you get what you want in the background, or how do you get the proper angle with the HDR? Or is it, trial and error and you get what you get? And how do you get them to look so clear? These images are awesome and a mini tutorial, if time allows for you two, would be great?
that question perhaps, stefan has more great knowledge than me when in terms of hdri, because he is well verse with this. im still testing this thing after i found out that you can actually control the brightness of the image as a background by lowering the override value (1 as default). then i started to play on those uvw transform parameters.
but one thing perhaps stefan can help is by explaining it to us.
as for mine, you could see some curvature happening because i repeated the u v. it should not be like that i believe. and perhaps stefan can shed some more light on this or other people who have knowledge on this.
one thing i know is you can rotate the (spherical) hdri how it will map it self in an imaginary sphere.
4oth, i just use the hdri as a background. my GI skylight is still the vray sun
[/quote]
nomeradona,
very nice work. i have a few questions:
for GI did you used the HDRI as well or is it a sun?
where did you got this hdr image?
[/quote]
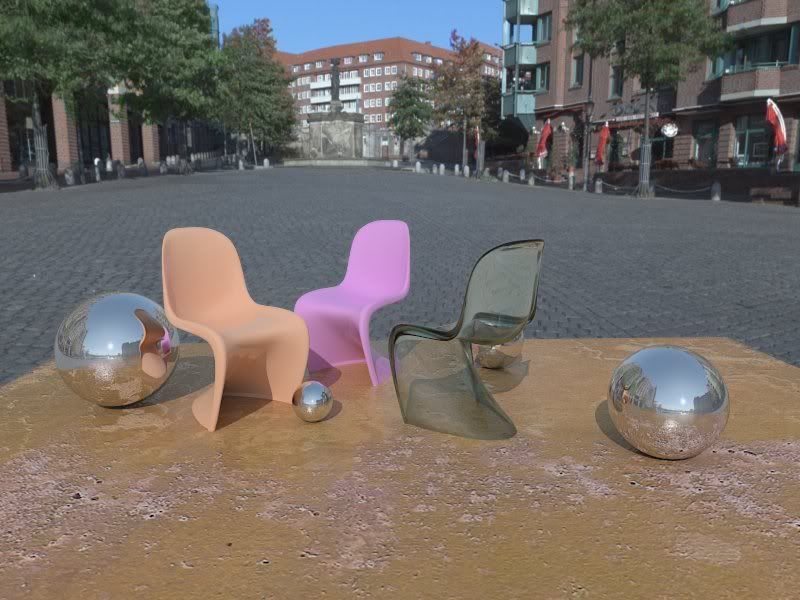
This it"s what I got when I moved the geometry far far away. I was trying to see if the hdri have a center, and if that center it's the geometry or the model of the scene. But the background it's the same ( position and size) as u can see, so I guess, that specific spherical map(HDRI), it's basically like a dome, or half sphere, and it's preserving the same size or position, if it's not altered by some parameters like "rotation" "repeat" or other. I try to repeat the hdri, but it's not working, maybe another type of hdri, more "cubic", if I may say so....I'll make that experiment too.
About the tutorial, as I was saying in my old posts, it's not such a big deal, just put the hdri file in the background slot, as "environment" in the UWV parameters,and as mapping type, you should choose the appropriate type for your hdri file. If your hdri file it's a spherical map, or panorama, then the type of mapping should be "spherical".
If you have a "light probe" hdri, then you have map it as " angular". Those two types of maps, it's the most used, so probably you only have this kind of hdri on your hard-drives.
I personally love HDRI because the lightning provided by these maps it's unmatched by every other method of illumination. Even my "clay" models became alive, when I use them, so....I always use HDRI, in background, and in GI(Skylight).If I want strong shadows from the sun, I use the sketchup shadows, and I take care that the "default lights" in global switches to be checked.
To make the model to match the background, I rotate the hdri only horizontal, and usually by 90 degrades. You can see that in the preview window, and usually the image it's parallel with your eyes. Anyway, the best method it's to overwrite materials in the scene, for a fast render, to see the environment. You don't have to finish the render, just to have a hint about how the background will look in the end. Then ,you can start rotate it, usually just horizontal. That's the way I do it, and that's about all I know about that HDRI. Almost forgot..the background it's so clear, because the hdri it's so good, because it's having very high resolution. I will render this scene with the same image, but with other resolution or type( probably light probe) and will see together what will be the result.
the hdri above it's about 6248x3124 pixel
that last image has 2048x1024pixel(hdri file that I used)
as you can see, that last one it's not so clear....so, bigger resolution- better quality
that one has 512x512 the lightning it's still good, but that because vray collect enough samples, so I'll demonstrate this in the next image, where I will use for background the bigger one, but for GI (for lightning) I will use the smallest one I have. More then that, I will use a blurred version of light probe. But this will be great, because the background will be clear, and vray will be happy to use the blurred hdri for lightning. Why? Because it's easy for vray to collect samples from a blurred image, because the samples will be...not so different one to each-other, since ware blurred, so the render time will be probably smaller.
This it's the one with a blurred version for GI
Look at the rendering time
In this one I used the biggest file, for both background and GI, and the render time was just a little bit longer. But there was not very complicated materials to render, so I presume, that those 12 seconds could be ...12 minutes or more , when we have complex materials.
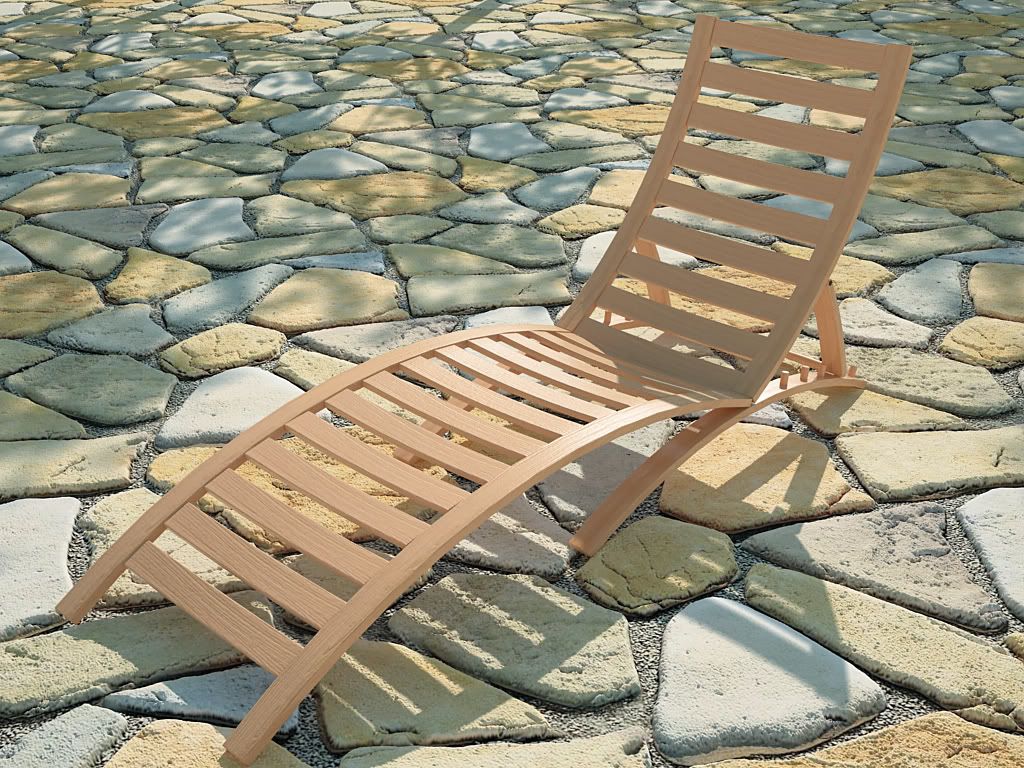
Hey didnt think this was worth wasting digital space by posting a new thread so here it goes.
i love this chair and couldnt find the model of it so i built it and heres the render
 Tweet
Tweet


Comment